

 Your fur baby will love the springy, lightweight motion of this toy. Cappy moves especially well on smooth surfaces like hardwood and tile. It's a great way to get your kitty moving.
What You'll Need
- Soft plastic food container lid (yogurt tub, cottage cheese, or the like)
- Two plastic water bottles, pureed fruit pouch, or a similar cap (it's more fun if they're both different)
- Scissors
- Nail or awl (a pointed tool used to pierce holes)

How to Make It
First, cut off the edge of the plastic lid and trim it into one barbell-shaped strip. The middle of the strip should be approximately 3 inches long and 1/8-inch wide. The barbell ends should be approximately a half-inch wide.
Next, carefully poke a hole in each of the bottle caps using the nail or awl. Gently fold together the barbell ends of the plastic strip and insert each end into the hole of a bottle cap. After you thread each end through these caps, unfold the barbell's ends to secure the cap in place. There you have it! Hours of joy as she watches both ends spin across the floor.
The Sputnik
 Much like the 1950s Earth satellite after which it's named, the Sputnik toy is out of this world. If you want to make your own cat toys and pay homage to outer space, this one's for you.
What You'll Need
- Small, plastic food container lid
- Thin, cardboard food box (cereal, pasta)
- Cellophane tape
- Scissors
- Box cutter
How to Make It
 Cut off the edge of the plastic lid, then carefully cut out six strips that are each about 1/8-inch wide and 2 to 3 inches in length, depending on lid size.


Tasty Tips
For the box, cut one cardboard strip 2 inches wide and 3 inches long. Fold the strip lengthwise into five equal segments, and then unfold. Next, fold the top and bottom of the strip so that they meet, then unfold (these creases will become Sputnik's box sides). Use the box cutter to cut slits in the vertical crease lines just to the horizontal crease line, creating flaps on the top and bottom of the strip. Cut two parallel slits, approximately the width of the plastic strips, in the middle of each of the five segments and on the top and bottom flap of one of the end sections.

Loop each of the plastic strips through the pairs of slits in the middle section of the cardboard. Secure the back of each loop with tape. Then, fold up the cardboard into a tiny box with the plastic strip ends extending out of each side of the box. Leave the strip lengths as is or trim to your cat's desire. These strips are durable and safe for your cat to play with, and one swipe of her paw will toss it in a random direction. Now you've got your very own satellite.
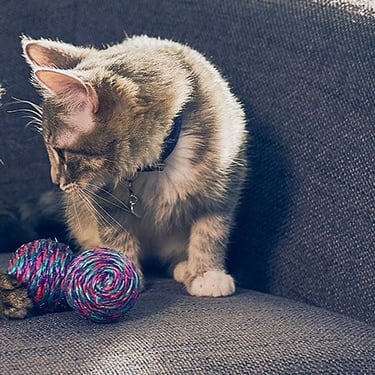
As with any cat toys, be sure to check your creations every now and then to ensure your cat hasn't ripped off pieces that could be choking hazards. If you're noticing any loose strings or dangling pieces it's best to take it away from your kitty to make repairs or replace it altogether. But learning to make your own cat toys is a fun way to liven up your friendship with your feline pal, and these DIY cat toys are just the thing to cure her boredom!
Photo source: Christine O'Brien

Related products

Sensitive Stomach & Skin Chicken & Beef Dinner
Gourmet daily nutrition, carefully made. Tasty chunks with chicken & beef in a decadent gravy. Supports digestive health, nourishes skin and promotes a lustrous fur.

Adult Chicken & Spinach Casserole Cat Food
With delicious chunks in a decadent gravy

Adult 7+ Tender Tuna Dinner Cat Food
With delicious chunks in a decadent gravy

Adult Tender Tuna Dinner Cat Food
With delicious chunks in a decadent gravy
Related articles
How Treat-Dispensing Toys Keep Your Cat Active
Are you looking to get your cat more active? Does she constantly look bored? Then you may want to consider using a food-dispensing (also known as treat-dispensing) cat toy, which provides both physical and mental stimulation during snack times.
The Proper Nutritional Balance Your Cat Needs
Good nutrition is about the right balance of nutrients. Learn more about health issues when feeding a cat food that has an improper nutritional balance from your friends at Hills Pet Nutrition.
Helpful Tips for Controlling Your Cat's Hairballs
Fun Games for Exercising Your Cat
Discover which cat toys games your feline friend might like, and how they are great sources of exercise. Explore our library of articles to learn more.
Put your cat on a diet without them knowing
Our low calorie formula helps you control your cat's weight. It's packed with high-quality protein for building lean muscles, and made with purposeful ingredients for a flavorful, nutritious meal. Clinically proven antioxidants, Vitamin C+E, help promote a healthy immune system.